Getting Started
This guide will help you set up AutoChunks and run your first optimization.
Prerequisites
- Python 3.9+
- (Optional) NVIDIA GPU for accelerated semantic embeddings (CUDA).
Installation
-
Standard Installation (CPU-compatible):
-
Enable GPU Acceleration (Recommended): If you plan to use Local Embeddings or Local RAGAS Evaluation, it is highly recommended to install the CUDA-enabled version of PyTorch. Without this, local models will run limited by CPU throughput.
- Uninstall current torch:
- Install CUDA 12.x version:
(Check your CUDA version with
nvidia-smiand adjustcu124to your installed version if needed).
When do I need GPU support?
- Local Embeddings: Required if you select "Local" in the dashboard. This runs the embedding model (like BGE or BERT) locally on your hardware.
- OpenAI and Ollama: Cloud or API-based providers offload the compute, so a local GPU is not required for the Python process itself. API keys can be provided directly in the dashboard or via the
OPENAI_API_KEYenvironment variable. - Local RAGAS: If you use a local Chat Model for RAGAS evaluation, a GPU is essential for acceptable performance.
Your First Optimization
1. Prepare Your Data
Create a folder named documents and drop a few representative PDF, Markdown, or Text files into it.
2. Run the Optimizer (CLI)
Execute the optimize command. Using --mode light (Light Optimization) initializes a fast sweep by sampling a specific subset of documents to find a winning strategy quickly.
Understanding the Optimization Pipeline
- Ingestion & High-Fidelity Extraction: AutoChunks performs layout analysis using structural extraction (preserving headers, meta-tags, and tables). Documents are cached via SHA-256 fingerprints to bypass extraction on subsequent runs.
- Adversarial Synthetic QA: The system generates Ground Truth pairs designed to break low-quality chunkers.
- Deterministic Heuristics (Default): Leverages sentence boundary analysis to create strict "needle-in-a-haystack" retrieval targets.
- Semantic Synthesis (Optional): Employs LLMs to generate nuanced, paraphrased queries (see the Configuration Guide).
- Vectorized Tournament: The engine fanned out across multiple strategy variations (Semantic, Recursive, Layout-aware).
- Retrieval Simulation: Every candidate is evaluated in a batch-encoded index, simulating production search across multiple metrics including nDCG and MRR.
- Plan Selection: A multi-objective weighted scorer selects the Optimal Plan based on your selected Optimization Goal.
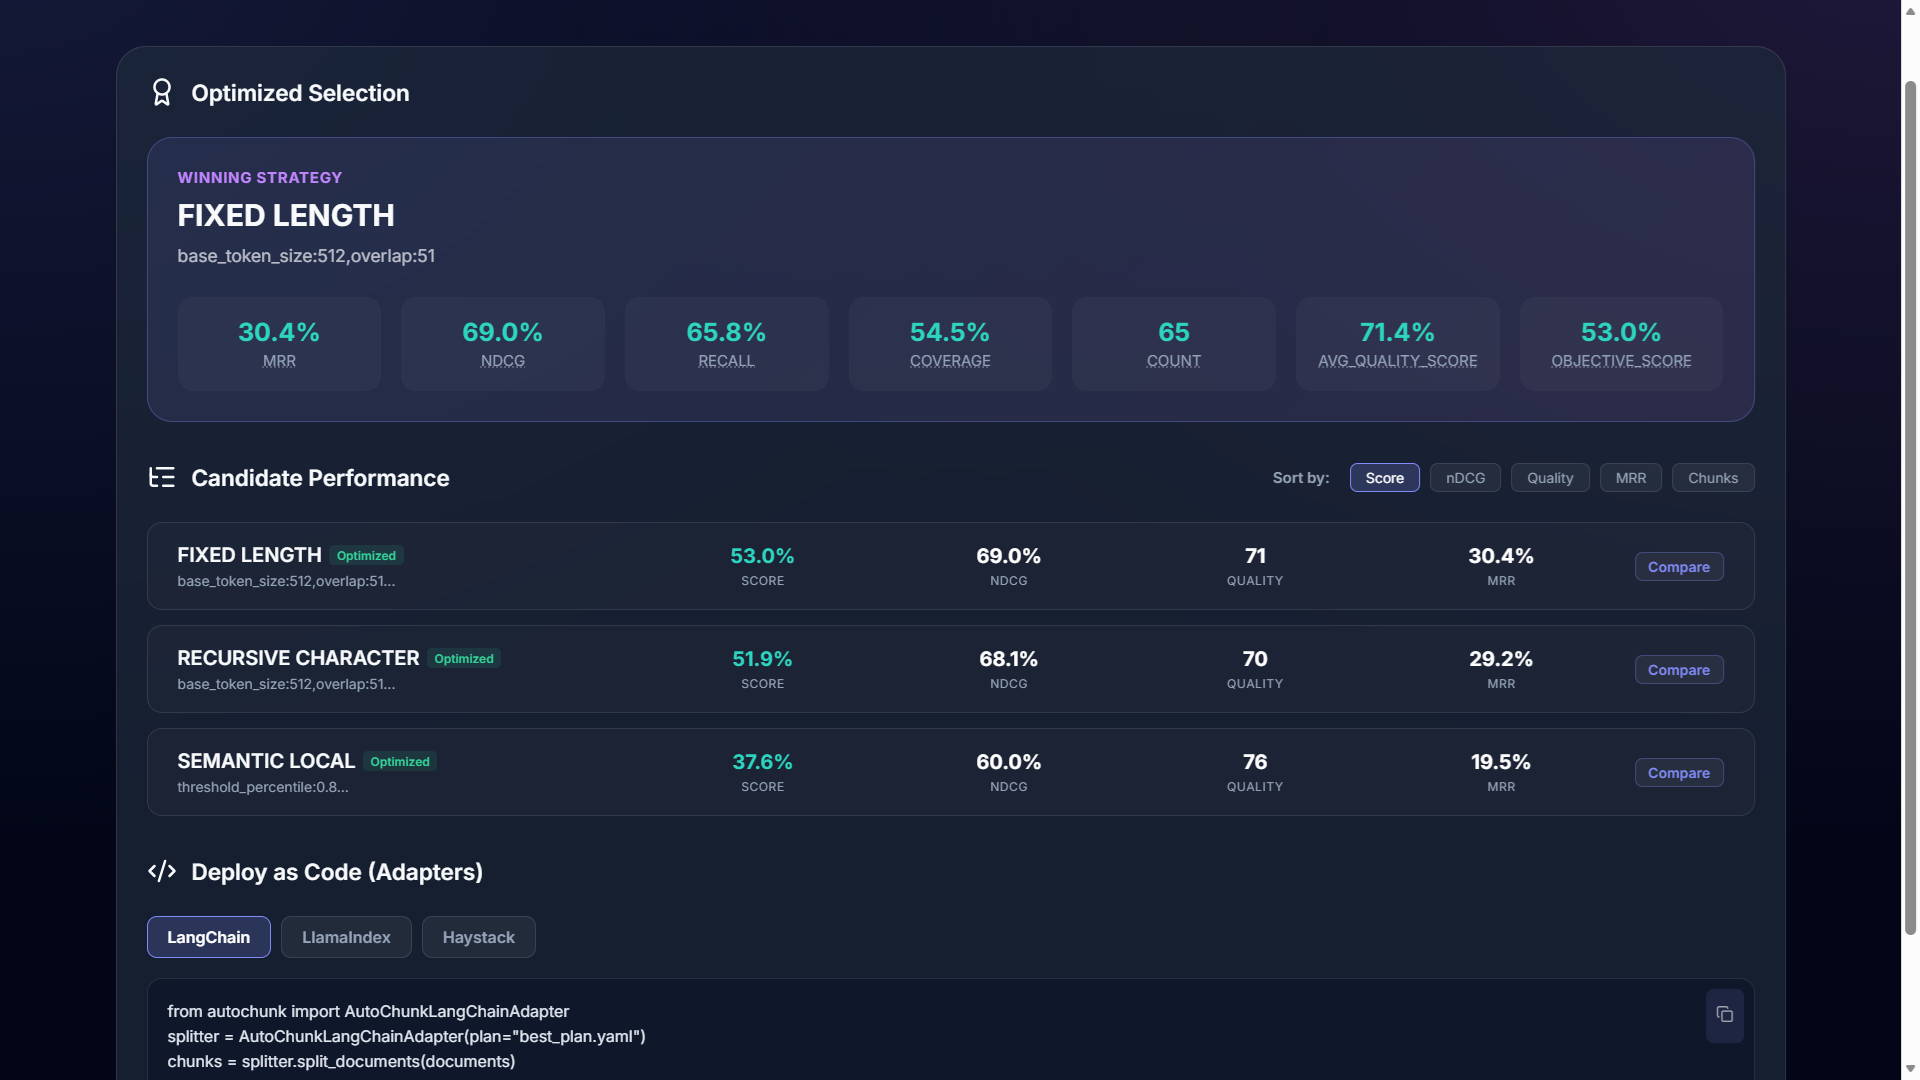
3. Launch the Dashboard
For a visual breakdown of why a certain strategy was selected, launch the dashboard:
Navigate tohttp://localhost:8000 in your browser.
Using the Result
Once you have a best_plan.yaml, you can use it in your code to process new documents with the exact same optimal settings.
from autochunk import AutoChunker, Plan

# Load the winning strategy
plan = Plan.read("best_plan.yaml")

# Initialize chunker
chunker = AutoChunker(
    embedding_provider=plan.embedding.get("name"),
    embedding_model_or_path=plan.embedding.get("model")
)

# Apply to new documents
chunks = plan.apply("./new_data", chunker)
print(f"Created {len(chunks)} optimized chunks.")